Hi FME’ers,
Not too long ago I was asked to write a post about Custom Transformers from a novice user’s point of view. Sometimes, it takes a while for such seeds to grow. This was no exception. Custom transformers are so important to FME.
The first half covers how to create custom transformers, what best practices exist, attributes and parameters, and how to delete a custom transformer. The second half will cover linked custom transformers, and how sharing works. I hope this lowdown will be useful to new and experienced users.
Part I
FME, Data Transformation and Custom Transformers
FME is not just about format translations; it’s about transformations. Hence, the most commonly created workspace is from Esri Shape format back to Esri Shape format. Users are using FME to transform data even when they don’t need to translate its format.
Some of these transformations can get quite complex. It’s not the user’s fault; they simply find that FME can do almost anything! Resultantly, they cram in a multitude of transformers trying to do everything.
At this point, a new user has often mastered the basics. The most difficult aspect of FME shifts from actually defining the transformations to remembering which bits go where and why. It’s very easy to place transformers into an empty workspace. However, to plug them into an existing workspace with a spider web of connections is more of a challenge.
This is where custom transformers can be so useful.
What is a Custom Transformer?
Most workspaces use a sequence of transformers to carry out a particular process. This uses transformers in series is what we call it in the training course. A custom transformer is simply a way to take that series and squash it down into a single object on the canvas.
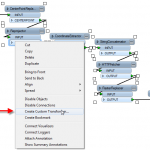
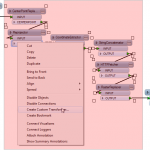
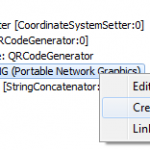
Simply select a bunch of transformers like this, right-click, and choose Create Custom Transformer (click to enlarge):
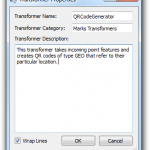
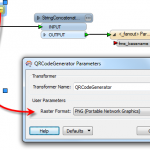
Give that transformer a name, category, and description like so (click to enlarge):
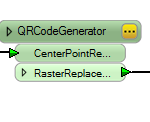
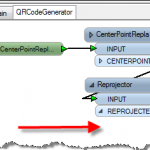
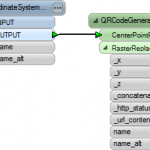
And on the main canvas the previous sequence is now replaced with this (click to enlarge):
The definition of the custom transformer is now embedded in a separate canvas tab (click to enlarge):
Benefits of Custom Transformers
How does that help? Here are some benefits:
- Tidier canvas
- Easier duplication
- Improved maintainability
- Sharable components
By compressing a section of related transformers (more on “related” later) I’ve made the original canvas much cleaner. When your canvas is congested with hundreds of transformers, cleaning it like this is a huge benefit.
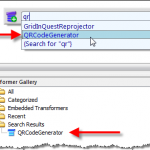
Easier duplication is the fact that now a re-usable module has been made and can be duplicated. I can duplicate that sequence of transformers in multiple places in the workspace by placing a new instance of the custom transformer. We can do this because FME kindly includes it within the Transformer Gallery to be used just like any other transformer (click to enlarge):
Improved maintainability comes about because all of the instances of that transformer share the same definition. Without a custom transformer, then I would need to search out each sequence and make the same edit multiple times. However, with a custom transformer I can simply edit the definition. The changes are propagated to all instances of that custom transformer. Neat, eh?
Having created a custom transformer, I can now share it with other users who might find that particular sequence useful later in this blog post.
Selecting the Transformers to Include
Above I remarked that the transformers compressed into a custom transformer should be “related”. In that vein, they should form some logical unit or component. The reasons should be obvious. If I’m creating the custom transformer to make the canvas more readable, then it helps to be able to put a label (name) on the custom transformer – and I can hardly do that if all its components are entirely unrelated like this (click to enlarge):
Likewise, if I’m creating the custom transformer to be a reusable component, then it requires the selected transformers to be related.
In the example under “What is a Custom Transformer?” (above), you may have noticed I used a workspace from a previous post on creating QR codes. I wanted to create a custom transformer to handle the QR code generation, and be reusable with any data.
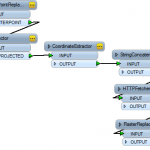
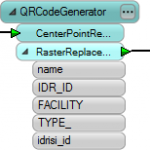
I was very careful to exclude the first and last transformers in the workspace because they were not related to creating QR codes. Those transformers handle tasks specific to the data being used, and wouldn’t necessarily be required for other data (and in fact could cause problems when used on a different dataset):
Ultimately, the idea is to generalize the custom transformer as much as possible, so that it will operate on any dataset. You will have improved its reusability.
Now let’s look at a few features that aren’t as obvious.
Attributes and Custom Transformers
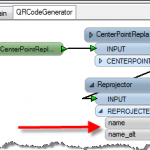
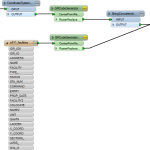
Attributes are perhaps the most confusing part of a custom transformer. When you first create the transformer, the definition shows all the attributes in the data (click to enlarge):
You do a bit more work and suddenly the attributes are gone (click to enlarge):
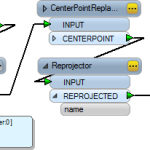
Why does this happen? The reason is simple: you’ve added a second instance of the custom transformer to the canvas. Once you do that, there is no guarantee the same attributes will be available. This example illustrates the point (click to enlarge):
Here, the custom transformer was originally created connected to the parks dataset, which has name and name_alt as its attributes. Now, there is a second instance connected to the emergency dataset, which has a different set of attributes. FME now has no way of telling which attributes may (or should) appear in the custom transformer and so hides them from the definition.
By hiding them from view, there is no chance you will accidentally use an attribute in the definition (eg name), that won’t be provided in all instances.
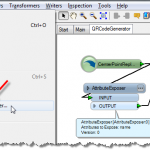
Of course you, as the workspace author, may know for sure that each instance of the transformer WILL be provided with a certain attribute. In that case, you can make the attribute re-appear in the custom transformer definition using an AttributeExposer transformer (click to enlarge):
So, the idea is that the author confirms an attribute exists (by using the AttributeExposer) before it can be used in the custom transformer.
If you notice, the second dataset does have the attribute but it is upper case (NAME, not name). FME is very case sensitive so, if you were banking on that attribute, an AttributeRenamer would need to be employed to fix the issue.
Luckily, the above is just an example.
Published Parameters and Custom Transformers
Published parameters can be confusing too. Normally, once a parameter is published, the end-user is prompted for a value at run-time. In custom transformers, this is a little different.
When a parameter is published in a custom transformer, it prompts the main workspace for a value; i.e. it appears on the parameters dialog for the custom transformer, but it doesn’t get used as a prompt at run-time.
To prompt for a custom transformer value at run-time, you must create a published parameter within the custom transformer first. Then, locate that parameter in the Navigator window back in the main canvas and publish it again.
For example, inside my custom transformer is a RasterReplacer transformer. It creates the raster output. I want the user to be able to decide what format to write, so I publish that parameter (click to enlarge):
This makes the parameter available in the custom transformer parameters dialog:
Now I can prompt at run time by locating that parameter in the Navigator window, and publishing it:
Best Practices
At the moment, my custom transformer definition has an ugly flaw. Can you see why?
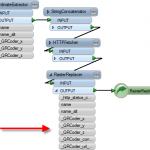
You probably spotted a whole bunch of new attributes on the output. However, none of those attributes are part of the output feature; they are all solely used inside the custom transformer.
To conform to FME Best Practice, I should clean them up and not output anything that isn’t required by the user. To do that, I’ll use a little trick. Firstly, I add a prefix to all the attributes I’ll use inside the transformer; for example _QRCoder_x instead of simply _x
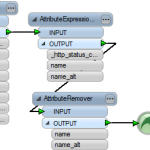
Now, I add an AttributeExpressionRemover transformer at the very end of the custom transformer definition. This removes all attributes that start with _QRCoder*
The final step is an AttributeRemover to get rid of the errant _http_status_code. After, file a PR with the development team to add the option to rename that (that is why I’ve had to use a separate transformer).
Still, when I go back to the main canvas, I now no longer export excess attributes from my custom transformer:
Deleting a Custom Transformer
The final section of Part I! I could simply erase all instances from the canvas to delete a custom transformer, like this:
But that’s not the complete answer. The tab for the custom transformer still exists so I will right-click and choose ‘close’:
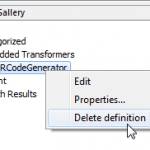
I’ve removed all instances, and closed the tab, but the definition for this transformer is still embedded in the workspace, and therefore still exists. The only way to really erase this transformer is to delete it from the transformer gallery like so:
Now, I can be truly confident I have erased this transformer completely!
Part II
Now, let’s go over linked custom transformers, and how sharing works in FME!
Exporting a Custom Transformer
You have a custom transformer inside your workspace and at the moment, it is coloured green. It is “embedded” inside the workspace. For example, the custom transformer can be used by any number of places inside this workspace, but cannot be used in a different workspace (unless you recreate it in there).
To share the same custom transformer simultaneously among different workspaces requires the transformer to be exported to a file that is linked to. Let’s look how.
Here’s my QR Code generating transformer. I wish to export it to a file to use it in another workspace. I click the definition tab and choose File > Export as Custom Transformer from the menubar (click to enlarge):
FME exports the definition, adding it to a separate file with a .fmx file extension, and then opens up that .fmx file in a new instance of Workbench:
The file doesn’t have to be open. It is just convenient so that you can check over the definition. But once that file is created, you can now locate the transformer in your transformer gallery. You could also use it with Quick Add (you may need to restart Workbench to see it) and use it in any workspace (click to enlarge):
Switching Modes
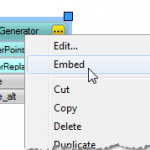
Once a transformer has been exported, it is now available within the workspace (embedded) and outside the workspace. The “outside the workspace” mode is called Linked. You can switch a custom transformer between the linked and embedded versions by right-clicking. Choosing the option Link or Embed (click to enlarge):
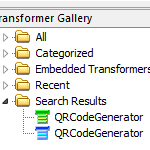
Notice how in Linked mode, the transformer changes into cyan. That way, you can always tell whether a transformer is linked or embedded. Interestingly, you can now have two definitions available in the transformer gallery: one linked and one embedded. That shouldn’t cause any confusion because they are coloured differently (click to enlarge):
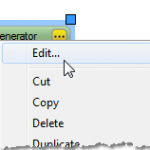
However, what does cause confusion is when you make an edit to an embedded definition. At that point, the two definitions no longer match. Workbench also removes the options to switch between Linked and Embedded. We don’t want you to switch to a different definition unaware (click to enlarge):
When the Linked option disappears, this is why. The edit doesn’t need to be large; even the smallest change makes the two definitions different and incompatible.
Default Modes
Perhaps you’re thinking it would be better to use one mode and stick to it? That’s not a bad tactic. You can formally restrict the different modes available to a custom transformer.
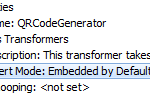
To do so, open the exported .fmx file in FME Workbench. Then, check for the “Transformer Insert Mode” parameter in the Navigator window (click to enlarge):
In this case, the transformer is set as “Embedded by Default”. That means whenever the custom transformer is used, it is always placed into a workspace as embedded. It can subsequently be changed to linked, but at first it is always embedded.
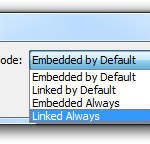
However, this parameter has some other settings (click to enlarge):
Linked by default means that the transformer is always placed in a linked state. Nonetheless, this could be changed by the user to embedded.
However, Embedded Always and Linked Always mean that the transformer will be placed in that state. It cannot be changed. If you want to force the end-user to place a custom transformer in linked mode, and keep it that way, then set the parameter to Linked Always.
Why would you want to do that? You may want an end-user to always use a transformer linked because you’ll be making updates to the central definition. You want to pass them on automatically (more on this below). Alternatively, you may want the end-user to be able to make edits, but not get confused over two different definitions.
Sharing with Others
The above section talked about end-users using the custom transformer, and the ability to share definitions with multiple users. That is useful. Let’s see how.
In one of the above screenshots, you could see the .fmx file was exported to <user>/fme/transformers. This is the default location for storing resources for a particular user. You could share a custom transformer by simply emailing the .fmx file to another user and asking them to put it in their own <user>/fme/transformers folder. Alternatively, they can double-click the file and FME will install it there for them.
However, the more interesting – and useful – sharing method is to place the fmx file in a location that everyone can access with FME. For example, I might create a shared folder on my computer (or a server) called <ServerName>FMESharetransformers and copy the fmx file there.
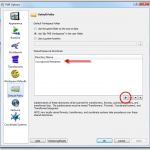
Users can have FME automatically use that folder as a location for resources using the default path settings under Tools > FME Options (click to enlarge):
Here, the user has added a shared resource folder. Now, their transformer gallery will pick up on any custom transformers in that shared location. Notice how they just selected the shared folder – not the transformers folder. That’s because there are several types of resources. Each with a subfolder. FME handles all of them automatically when you select their parent as a shared resource location (click to enlarge):
Editing Linked Transformers
One final question must be, when a custom transformer is shared, what happens when an edit is made?
The concept of linked and shared custom transformers is that updates will be used automatically. For example, say I use the QR transformer in a workspace like this:
The output – as expected – is a series of raster features showing QR codes. The raster features aren’t georeferenced, and so overlay each other in the output.
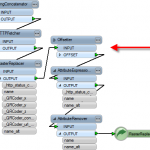
Now suppose, for example, the fmx definition of the transformer is updated. The author may want to georeference the rasters to the location of the original feature, and uses an Offsetter transformer to do that (click to enlarge):
Now, as an end-user, I run the translation again. This time, I get georeferenced output (click to enlarge):
This proves that changes made to the shared definition are automatically inherited by any workspace that uses it. This shows that an author can fix bugs in the transformer without the end-users having to update their workspaces to take advantage of it.
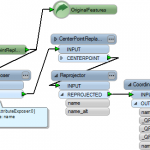
However, that’s not the whole picture. Say, for example, the author now thinks it would be a good idea for the custom transformer to output the original features as well – through a separate port – so that they don’t get lost entirely. The definition might look something like this (click to enlarge):
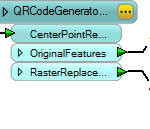
Because the change involves a new output port, this doesn’t translate so well to any workspaces that use it. There isn’t a way to automatically add that port to a workspace – or figure out what to connect it to. In that scenario the end-user must hit the refresh button on the transformer gallery (or restart Workbench). Then, the end-user must replace the custom transformer with a new instance, in order to get the new output port:
As a rule, workspaces don’t need to get refreshed when it is the data emerging from the custom transformer that will be affected by any updates. These differences are applied automatically. But when the structure of the custom transformer changes – for example new input or output ports are added – then it is necessary for end-users to replace the transformer to get the updates.
Phew! I think that’s probably enough. Of course if you do have any further questions – or problems using custom transformers – then please don’t hesitate to get in touch, either with me or with any member of the Safe Software at info@safe.com
Also be sure to check out the FME Community, where we post many helpful tips and updates. Keep up with the latest news about FME and customer transformers. It is another avenue where you can ask questions too!
I hope this couple of posts was useful.
Cheers

Mark Ireland
Mark, aka iMark, is the FME Evangelist (est. 2004) and has a passion for FME Training. He likes being able to help people understand and use technology in new and interesting ways. One of his other passions is football (aka. Soccer). He likes both technology and soccer so much that he wrote an article about the two together! Who would’ve thought? (Answer: iMark)